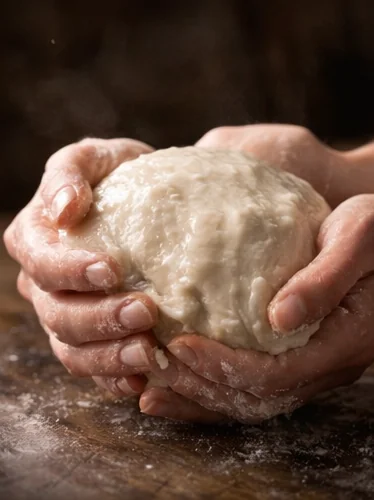
What Is Hydration?
Hydration in pizza dough refers to the ratio of water to flour, expressed as a percentage. A dough with 500g flour and 325ml water has 65% hydration. This single number influences almost every aspect of your final pizza: crust texture, chewiness, bubble structure, ease of shaping, and baking behavior. Understanding hydration is the most important step toward consistent, high-quality pizza.
60% Hydration – The Dense, Easy Dough
At 60% hydration, the dough is firm, easy to handle, and won't stick to your hands or surface. It bakes into a denser crust with fewer air bubbles—closer to a Roman-style or American thin crust. Great for beginners, excellent for crispy bases, and very forgiving. Less complex flavor than higher hydration doughs.
65% Hydration – The Neapolitan Sweet Spot
This is the hydration used in classic Neapolitan pizza (AVPN standard). The dough is slightly tacky but manageable with practice. It produces an open, irregular crumb structure with visible air pockets, a soft interior, and a satisfying chew. 65% is where flavor and texture perfectly balance.
72–80% Hydration – The Pro Territory
High-hydration doughs are extremely extensible, develop incredible flavor during fermentation, and produce massive air bubbles and a very open crumb. They're also very sticky and challenging to handle. These doughs require good technique, bench scrapers, and confidence. The reward is extraordinary: incredibly light, airy, charred Neapolitan pizzas.
How to Increase Hydration
If you want to try higher hydration, increase gradually—add 5% at a time and adapt your technique. Use the autolyse method (mix flour and water, rest 30 min before adding yeast and salt) to improve extensibility. Use a bench scraper for handling. Cold fermentation helps develop the gluten structure needed for wetter doughs.
Hydration by pizza style
Hydration is not a badge of honor. A 75% dough can be worse than a 62% dough if the flour is weak, the oven is slow or the baker cannot move the dough without adding too much bench flour. For home pizza, the best hydration is the one that gives stretch, browning and a stable base in your oven.
| Style | Good starting hydration | Why |
|---|---|---|
| Neapolitan-style, very hot oven | 60-65% | Soft, extensible dough that bakes fast without drying out. |
| Home oven on steel | 63-68% | A little more water helps oven spring, but steel keeps the base crisp. |
| New York-style | 62-66% | Enough chew and browning without making slices floppy. |
| Pan pizza | 70-80% | The pan supports the dough, so higher hydration can become airy instead of messy. |
| Gluten-free psyllium dough | 80-100%+ | Psyllium and starches bind water differently; the dough needs hydration time, not heavy kneading. |
How to read the dough
If dough tears while stretching, it is not automatically too dry. It may be under-rested, too cold, or not mixed enough. If it spreads like batter and cannot hold a rim, hydration is too high for the flour or fermentation went too far. A good pizza dough stretches with resistance, keeps a soft rim and does not need handfuls of flour to move.
72-hour dough: when it helps and when it hurts
A 72-hour cold fermentation can build better flavor and easier stretching, but it is not magic. It works best with enough protein, accurate salt and a cold fridge. If the dough smells sharp, collapses or sticks badly, it has gone too far. For many home bakers, 24-48 hours is the sweet spot before pushing to 72 hours.
Common hydration mistakes
- Too much water too soon: raise hydration in 2-3% steps, not from 60% to 75% overnight.
- Wrong flour: weak all-purpose flour may not hold the same water as strong bread flour.
- Cold dough shaping: dough straight from the fridge tears more easily; let it warm slightly.
- Too much bench flour: it lowers real hydration at the surface and can make the crust dusty.
Practical hydration adjustments
If the dough feels too stiff, do not immediately pour in a large splash of water. Add water in small steps, mix until absorbed, then let the dough rest for 10 minutes before judging it again. Flour hydration is slow; a dough that feels tight after two minutes can feel completely different after a short rest.
If the dough is too sticky, resist the urge to bury it in flour. First ask why it is sticky: high hydration, warm room, weak flour, over-fermentation and too little salt can all create the same symptom. Lightly oiling your hands is often cleaner than adding flour, especially when you still want an airy rim.
Home oven reality
In a domestic oven, hydration must match heat. A very wet dough needs strong bottom heat, otherwise steam stays trapped and the center bakes soft. If you bake on a cold tray at 220 °C, lower hydration is usually easier. If you bake on steel at 270-300 °C, the dough can handle more water because the base sets faster.
Simple test bake method
When changing flour or hydration, make one small plain test pizza before loading it with toppings. Use only sauce and a little cheese. If that base bakes crisp and bends without cracking, the dough is ready for heavier toppings. If it is already soft when plain, more cheese or wet vegetables will only make the problem worse.